
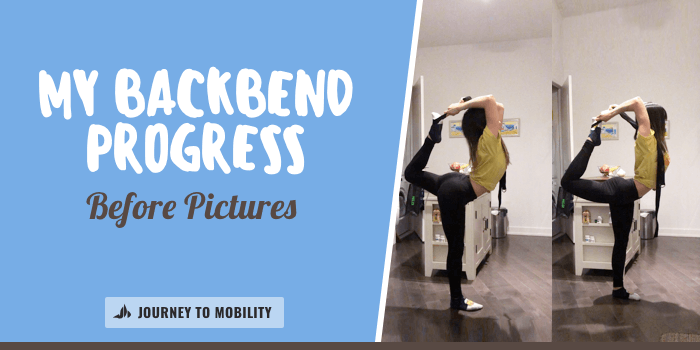
I always thought that I had good posture. Ever since ninth grade math class, I practiced sitting at the edge of my chair with a straight back. It wasn’t until the last few years where I started noticing pain in my upper back that would persist for days. The pain would continue until I made the effort to roll it out or get a massage. Recently, I decided to dedicate time to healing my back and to learn what the most effective stretches are for back flexibility. Here, I will be documenting my backbend progress as a beginner and my “before” pictures (March 2020).
Overview
- Back Flexibility Background
- Step 1: Rolling Out My Upper Back
- Back Bending Progress Pictures
- Simple Back Bending Stretches for Beginners
Back Flexibility Background
A few weeks ago (prior to self isolation), I went to a massage therapist looking to relieve pain in my upper back. I thought that the pain was between my shoulder blades but during the massage, I realized that most areas were very painful. My RMT told me that he couldn’t go more firm because of I was in a lot of pain.
The RMT helped me pinpoint which areas were extremely tense by feeling the knots in my back. There were also trigger points which when pressed would create a sensation that would go down my arm.
It turns out that the pain was in my Upper Trapezius, Neck, and weakness in my Infraspinatus (one of the four rotator cuffs that helps to stabilize the shoulder). Pain in the infraspinatus is most likely caused by repetitive motions in the shoulder and overuse. This made a lot of sense- I did heavy lifting for 5 years and never stretched.
At the end of the massage, my RMT recommended the following stretches to practice a throughout the day (3 sets per side).
Step 1: Rolling Out my Upper Back
After visiting my RMT, I decided to fix my back. First, I would use a peanut massage ball to roll out as a part of my morning routine.
So far I’ve been rolling out for 2 and a half weeks and I’ve noticed huge improvements in back muscles. Before starting, I could gently press down anywhere on my back and it would be incredible painful. After 2 weeks, most of the pain was gone, I was able to pinpoint specific areas that hurt and worked on rolling those out.
By 2 and a half weeks, most painful areas have subsided and I’m able to apply a lot more pressure (woo, small win!). This gives me enough of a foundation to start incorporating backbends into my stretching routine. The next step is to do yoga for 20 minutes every morning with new stretches that target my back and then create a backbending routine to do each night.
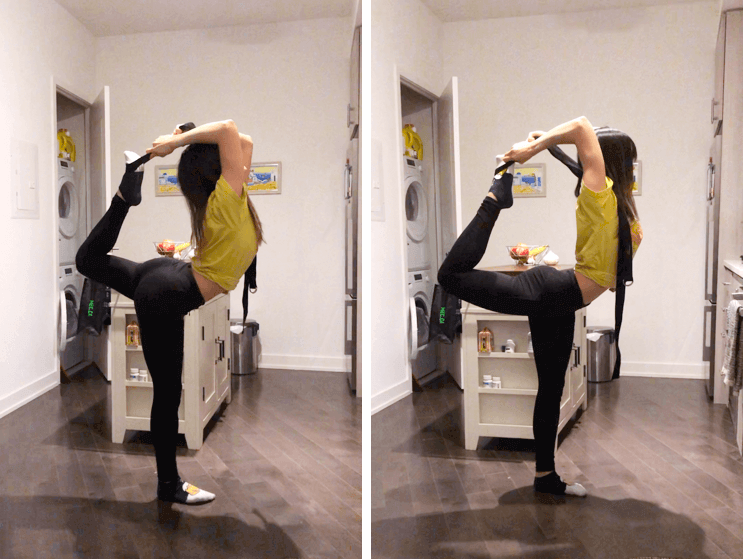
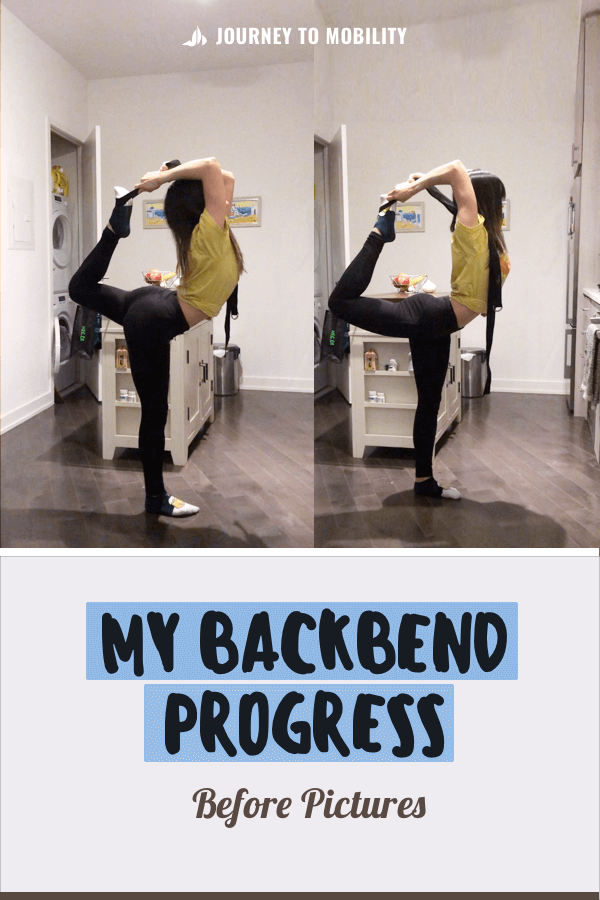
Back Bending Progress Pictures (March 2020)
Here are my not-so-proud backbend progress “before” pictures as I work on improving my upper back flexibility (and eventually my stiff lower back).
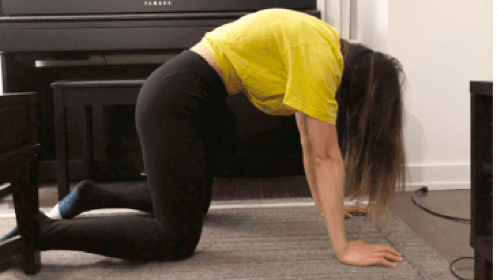
Cat Cow Stretch
For this pose, I would practice arching my lower back and squeezing upper back one each inhale. Then on each exhale I would actively press against the grow to create a “C-Shape” with my back. I’m happy that there’s a bit of a curve- my parents who have had chronic back pain have a straight back while doing this movement.
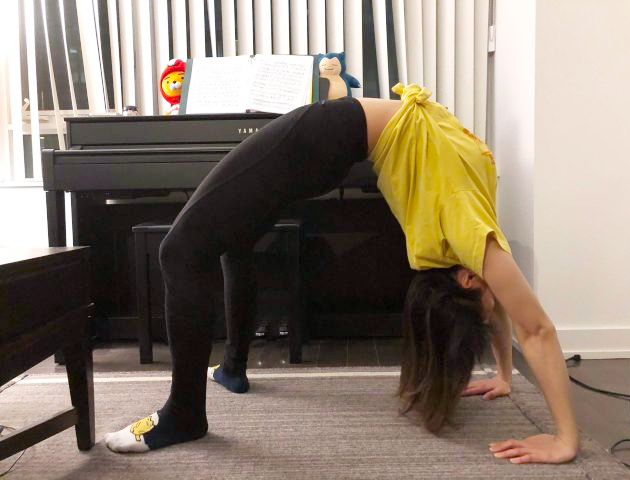
Wheel Pose
The wheel pose is a deep spinal stretch in yoga. I’ve been able to do this one as a child so I wasn’t afraid to attempt the pose as an adult.
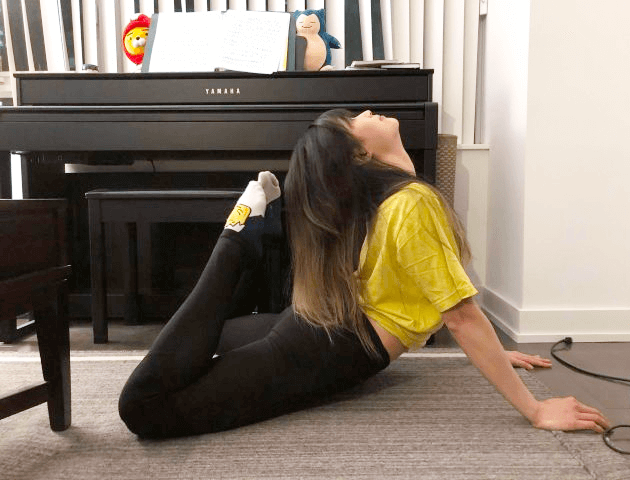
Head to Toes
I was also able to do this pose as a child but unfortunately, I can’t do it anymore. In my head, my toes a lot close to my head but in reality I’m about 7 inches away (sad face).
Assisted Dancer’s Pose
I’ve done this pose a few times in yoga class. However, I’ll need to look up what the proper technique is. From my backbend progress pictures, I realized that my left side is my good side. My back and right hip is a lot more stiff compared to the left. This seems to be the case when I’m doing the pigeon pose as well.
Simple Back Bending Stretches for Beginners
- Upper back stretch routine (tbd)
- 50 minute heart-opening yoga flow by Heart Alchemy every day for the past few weeks, I’d highly recommend this for intermediate/advanced practices)
- 20 minute rolling out with a Peanut massage ball (if you haven’t tried one of these, I cannot say enough about what it’s done for my flexibility)
Conclusion
I hope these backbend progress pictures will help you get a feel for what it’s like at the beginning of a flexibility journey. I’m excited to learn the technique for new poses and start improving my back flexibility! Hopefully, by the next few months, I’ll have some tips to share about what worked and didn’t work. Stay tuned!
See More of my Flexibility Progress:
- Current Back Flexibility Progress (July 2020)
- My Front Splits Journey (5 months)
- My Side Splits Progress in 2 weeks
- Pancake Stretch Progression
For your Dancer’s pose you might want to look up cheerleading techniques for Scorpion as it is the same pose! Coaches usually would tell you that pulling up rather than towards your head will help, which is true believe me.
Good luck!!
Thank you so much May!! I appreciate the comment, I’ll look up techniques for Scorpion pose and see what I can learn :).